Tuesday, January 26, 2010

Tutorial: How to Hem Jeans Like a Pro

The Backstory
I am short. All the jeans I buy are too long for me. But I sew. So I thought I could cut off the excess length and rehem the jeans, no problem. I was wrong--they looked awful and hand-sewn. In addition, I often broke a needle or two in the process--even thick needles labeled for leather and denim. I tried all sorts of gadgets invented for the home sewer hemming jeans, including a hard-to-manage plastic plate called "Jump the Bump" (I'm not kidding), but nothing worked.

Over time, I realized my inability to get a professional hem was because I do not have (a) an industrial sewing machine capable of sewing through several layers of denim, or (b) a professional sandblasting machine which gives the original hem that lovely worn look.

Then one day a college roommate, who was also short, plunked down a hundred or two for a pair of designer jeans and changed my life. Like most high-priced items, the schmancy store was willing to alter them (re: shorten them) for her for free. They still had that professional look. I couldn't figure out how the store tailor had achieved it as I doubted he had a sandblasting machine back in his little corner. So I asked to look at them. Up close. She obliged. And what I discovered on closer inspection was...

They were cheating!

And since then, I've been cheating, too. I've also converted several other people to the cheater's method. I once derailed an entire baby shower by mentioning this technique in a side conversation to someone who was bemoaning her inability to find jeans short enough and others overheard me and asked me to explain it and, well, derailment ensued.

So, since I bought a new pair of jeans yesterday, I finally decided to document it in pictures. I did not invent this method. I think you'll find others on the internet touting the same thing. But here's my take on it...

Step 1: BEFORE

Put on your new jeans. Look at the elephant legs their excess length creates. Shed a few tears over not being 6 feet tall. Mourn the NBA career you will never have.

Step 2: Cuff jeans to desired length.

Make sure the bottom of the cuff grazes right where you want it to. Also make sure you are wearing the type of shoes you plan to wear with your new jeans. Here, I am wearing flats as I plan to wear mostly flats and sneakers with these jeans. Notice how I still have it skirt the ground a little bit--don't get greedy and go too high. This is especially true of bootcut jeans*, like these ones, or straight-leg jeans--if they are above the ground, they will look like high-waters. If you wear skinny or cropped jeans, you can take them to the ankle if that's how you like it.


Step 3. Measure the cuff.

For this measurement, you want to go from the bottom edge of the cuff to the end of the original hem. In other words, you want to INCLUDE THE HEM in this measurement (it will be different for the next one; don't mix these two up). Here, mine worked out to be 2 inches from cuff to hem. This is the amount that I want to shorten the jean.


Step 4. Take that last measurement and divide it in half.

My measurement was 2 inches; therefore, half of that is 1 inch.

Step 5. Reduce cuff to reflect new measurement and pin.

Here, I reduced the cuff until it was only 1 inch from the edge of the cuff to the hem. This time, DO NOT INCLUDE THE ORIGINAL HEM in your measurement. Pin along the inner edge of the hem as shown below.


Step 6. Sew along the inside of the original hem using a straight stitch.
Here, I am using a zipper foot so I can get as close to the original hem as possible without actually stitching through any part of it.

This is the brainchild of the cheater's method--because you are only going through two layers of denim instead of three, it is much easier on you and the machine. The original hem also provides a perfect guide for your stitch (although, in the process, you may discover the professionals are not as precise as you assumed).
It will still be a little rough going over the leg seams (particularly the inner one), but far easier than if you had the fabric doubled up again.

If you have a bootcut or cropped jean, the original hem might not be the same width as the part of the leg to which you are sewing it. Fortunately, most of these cuts of jeans also include some stretch--just pull on the shorter part as you go to make it work.

Step 7. Turn the cuff into the leg.
Once you have done this, here is how it looks on the outside of the jean...


... and here is how it looks on the inside....


Step 8. Stitch in the ditch.
Place the leg back on the sewing machine as pictured below. Using thread that relatively matches the denim (nobody will get close enough to see it), stitch about one inch in the ditch of the leg seam, tacking the cuff you've created into the leg. Reinforce this stitch by going over it again in reverse.
Repeat for each leg seam (i.e., twice per leg, four times total).
You might be tempted to skip this step, but if you do, the cuffs you've sewn will forever be falling out and exposing themselves. If you were going for that look, you might as well have just rolled your jeans.


Step 9. Press seam.


When you are finished, it should look like this:


I brightened this picture so you could see the seam I created. However, none of your friends will ever get close enough to your leg to notice it, unless (1) your friend has some serious personal space issues, or (2) you are in the process of kicking your friend in the face, in which case, I seriously doubt the hem on your jeans is going to be the matter that ends your friendship.
As you can see, the manufacturer's top-stitching and sandblasted hem remains intact.
Step 10: AFTER
Revel in your petite-ified look and intact sewing machine needle.

A few other notes
The cheater method is virtually idiot-proof. That is, if you measure wrong, you can take out the stitches and start over--you didn't actually cut any of the denim off.
*I know that bootcut jeans are passé, but I have bought no less than three pairs of skinny jeans and, after wearing each around the house for at least a day, have decided to grant mankind the favor of not wearing them in public.
Writing this blog post took about 5 times longer than hemming the jeans did.
Am I the only one who's having serious paragraph-spacing issues on Blogger lately?

Monday, January 25, 2010

In Other News...


1) I've been wanting these books by Jim Krause for a long time, but only recently decided to wield a Borders coupon and nab the three-volume set. They are pretty amazing and are worth more than the entire year of design school I attended before switching majors to film. (By the way, I wouldn't recommend that move to anyone, at least not financially...)

2) I am going to try really hard to come up with some non-Etsy blog posts this week, including a long-planned tutorial on how to hem jeans.


3) Blog love: http://celestinacarmen.blogspot.com/2010/01/screenprinting-finds-etsy-valentine.html


4) Behind the times as usual, I am Flickring. Like, even my mom already has a Flickr account. Any tips?

5) This lovely spacing job is courtesy of Blogger.

Etsy Monday -- Rose Purses Galore


You'll have to head over here to check out the full selection.

Tuesday, January 19, 2010

Etsy Monday--Big Ben Screen Prints


Yes, I know it's Tuesday again, but this time cloudy weather prevented me from taking the photos I needed to post on Monday. But enough about that...

Whenever I take pictures of my prints in frames, I like to surround them with vases, figurines, what have you in order to create a vignette of sorts. I have lots of modern vases and such, but they are all in storage somewhere in Oakland. Fortunately, my mom, at whose house I am presently vacationing and printmaking, has an ample supply of home decor items for me to use.


For example, these are three white pitchers I gathered up as possible participants in the Big Ben photo, but decided against using.

And this is just a sampling of other such pitchers and vases that I found while conducting an impromptu three-minute photo tour of her house:


As you might have guessed, she wasn't home at the time.

Tuesday, January 12, 2010

It's a Mystery

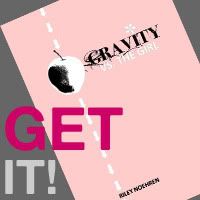
So, if I haven't mentioned it before, I continue to be amazed by those of you who not only took the time to read my book, Gravity vs. the Girl, but to spread awareness about it via word of mouth, your blog, etc. (for instance, this latest blurb from an actual, real, certifiable, published author here.) I try to express direct thanks for those mentions that make their way to me through my Google alert--but if I missed one, please know how grateful I am.


The Kindle version of the book has also had a little surge in popularity as of late. I can tell from the "customers who bought this item also bought" feature on Amazon that the source of the new sales are Kindle owners who read really cheap self-published romance novels. If that is my new demographic, then I embrace them wholeheartedly. Thanks to them, the book occasionally makes its way onto a couple of Amazon's "Popular in this Category" lists. See, for example, this screenshot from yesterday:


As you can see, GvsG was number 6 in the "Books > Entertainment > Humor" category and number 40 in the "Kindle Books > Mysteries & Thrillers > Thrillers > Legal."


Great news, right? Well, not if you bought the book hoping for a riveting legal thriller, because you were probably royally disappointed. The pink cover devoid of any images of gavels or the scales of justice should have tipped you off. Still, I have a feeling I may have confused Amazon's autobot category determiner by using the words attorney and ghost so often in the book. My sincerest apologies, autobot.

Etsy Monday--Big Rose Bags


Except, as you may have noticed, it's not Monday, it's Tuesday. Still, I listed them on Etsy on Monday, so that counts, right? Kinda like when people say "It's Christmas in July!" Only, why do they say that?

Thursday, January 7, 2010

Zoolander


I went to the Phoenix Zoo today to photograph some animals for an upcoming art project. This was my zoo growing up, site of many an elementary school field trip. I was pretty excited to eat in the actual food court for a change today, instead of being forced to consume a cafeteria-prepared bag lunch while the smell of french fries wafted from the food court. So yeah, it was a big day.

Like most zoos, the Phoenix Zoo has lots of informative plaques and recordings to help you learn about the animals on display. But after seeing the Endangered Species Carousel, which is at the center of the Zoo, I'm not sure if I can believe any of it.


Here is a picture of the sign to prove that it is, indeed, an Endangered Species Carousel. You get the idea... all of the animals on the Carousel are different endangered species (my precious Giant Panda was shoved way in the back).

But then there is also this:


What?!! First, this isn't endangered--you can find a resin teal dragon in just about every Chinese restaurant in Los Angeles. Second, this cannot be a real species. I had to go to the Zoo's website, which provides helpful information about each animal represented on the ride. According to that, this is a "Sea Dragon." Then I Googled "endangered sea dragon" and came up with lots of info about an endangered leafy sea dragon, which looks nothing like this (think kelp with eyes). Then I Googled just "sea dragon" and came up with lots of pictures that look just like this, all of them illustrations on medieval gamer websites. Enough said.

You might want to know that the Endangered Species Carousel also features Triceratops:


No seriously, at first I wasn't sure if it was Triceratops due to the showgirl horns and all, but then I confirmed it on the same zoo website. This, of course, begs the question: How old is this ride? Cause I think "endangered" is a bit of an understatement.

Sunday, January 3, 2010

Etsy Monday: Valentine Overload


As part of my New Year's resolution to list at least one new item on Etsy every week, I will also be posting here every Monday about said new item. If you are adverse to such self-promotion on blogs, I have this to say: (a) I don't get it [it's a blog, after all]; (b) I totally get it [it irks me, too]; and (c) just stay away on Mondays if that makes you feel better.


With that, today's new items are.... hand-pulled, screen-printed Valentines, in about five million different ordering combinations. My fingers are hurting from all the relisting and I forgot to put the ugly wrist brace on because I am upstairs and it is downstairs, which may as well be China, and I thought the listing would only take five minutes and it took an hour and a half.


And yes, I did do black Valentines. I'm sort of banking on the world being ready for that one.


Resolve 2010!

In 2010, I aim to...
  1. Always have painted fingernails
  2. Be healthier
  3. Convert to optimism
  4. Refuse to be defeated by details
  5. Finish first book with Mrs. Dub
  6. Spend more money on big things
  7. Spend less money on little things
  8. Travel somewhere I've never been before
  9. Wear this ugly wrist brace whenever I'm typing, cutting, sewing or screen-printing
  10. Post something new in my Etsy shop every Monday
  11. Stop writing rules for myself
  12. Draft doable to-do lists
  13. Embrace public transportation
  14. Wear more flats
  15. Appreciate the present